In this chapter
How the books work
Each property keeps its own double-entry books. Most entries are made for you as your team works:
| When this happens… | …it is posted to the books automatically |
|---|---|
| A restaurant bill is paid | Sales, GST and cash/bank |
| A hotel folio is settled | Room and F&B revenue, GST and cash/bank (or the City Ledger) |
| Goods are received (GRN posted) | Inventory, input GST and the supplier's balance |
| A supplier is paid | The supplier's balance and cash/bank, with any TDS deducted |
| Payroll is paid / an advance is given | Salaries or staff advances and cash/bank |
| An expense is recorded | The expense account and cash/bank |
Your accountant only needs to record the items that don't come from day-to-day operations.
Note: The Finance & Accounting menu is visible to the account owner, and to staff given finance permissions through a custom role or the Full Access preset. None of the ready-made staff roles include it.
Most reports offer This Property or All Properties, so owners of several outlets can see each one separately or combined.
Chart of Accounts
Go to Finance & Accounting → Chart of Accounts. Every account is listed with its Code, Name, Status and current Balance, grouped into Assets, Liabilities, Equity, Revenue and Expenses.
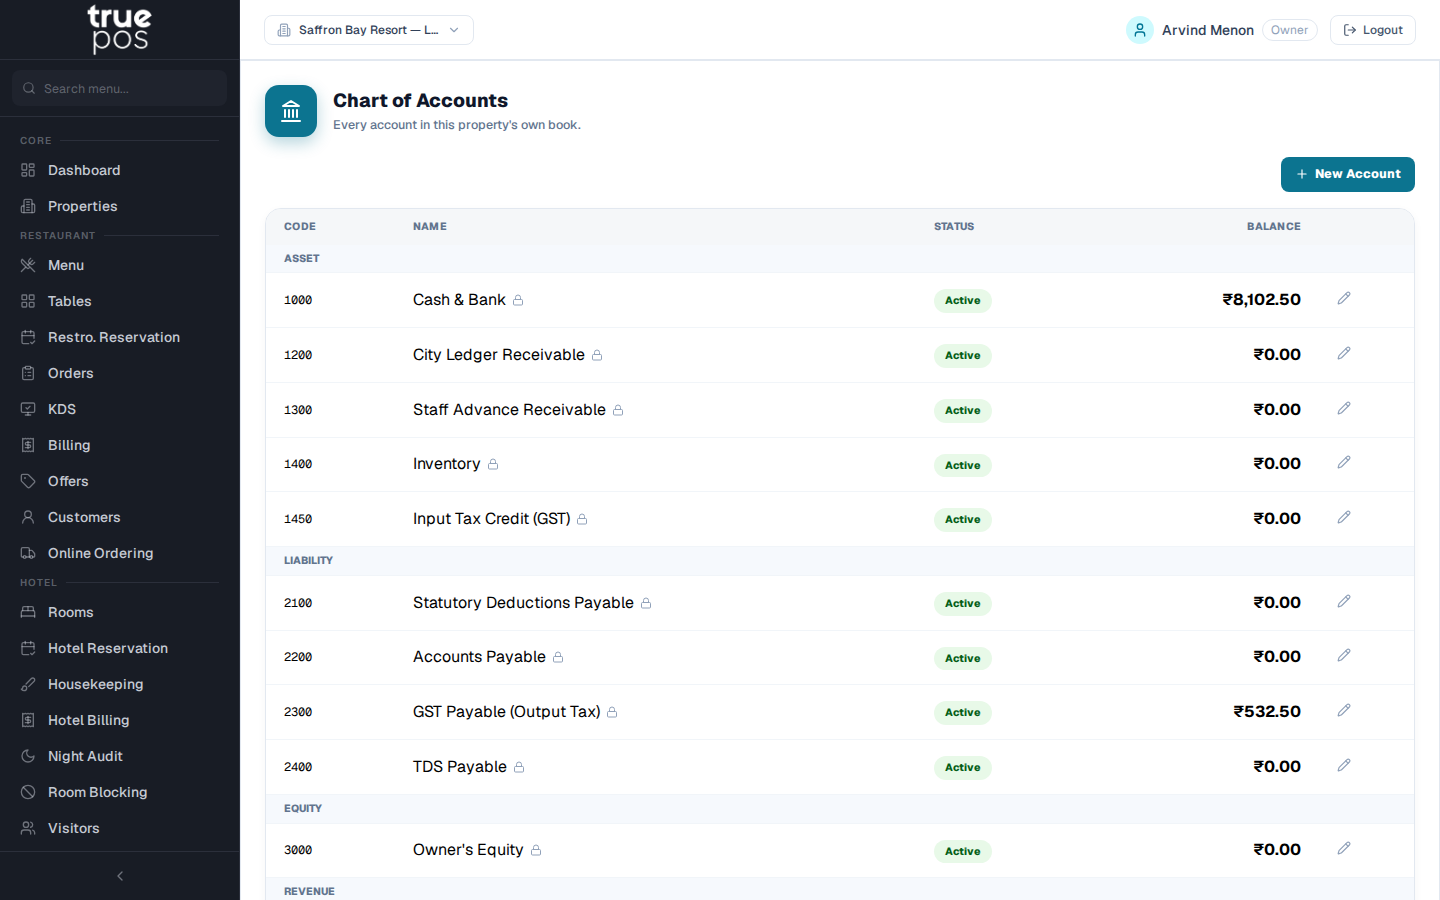
The standard accounts are created for you, and marked as default system accounts, which can't be deactivated. To add your own, click New Account, choose the Type, and enter a Code (for example 5100), a Name (for example Office Rent) and a Description.
Recording expenses
Go to Expenses and click New Expense.
- Enter a Description (for example Office rent — August) and the Amount.
- Choose the Expense Account, and how it was Paid Via (cash or bank).
- Add the Vendor and Notes if useful, then save.
- Click Attach to add a photo or PDF of the receipt (up to 5 MB).
Recurring Templates handle regular costs such as rent or subscriptions. Click New Recurring Expense, and set the Frequency and the Next Due date. Templates can be switched between Active and Inactive.
Tip: If there are no expense accounts to choose from, create one in Chart of Accounts first.
Manual journal entries
For anything else, such as depreciation, opening balances or corrections, go to Journal Entries and click New Journal Entry:
- Enter a Description.
- Add Lines: choose an account, and enter a Debit or Credit amount. Click Add Line for each one.
- The entry must show Balanced (total debits equal total credits) before you can click Post Entry.
The Journal Entries list shows every entry, both automatic and manual, with its Source.
Closing a month
Go to Periods, choose the Year and Month, and click Close Period. A closed month is locked against new postings, so figures you've reported can't change by accident. Every month is open until you close it.
If you must correct a closed month, click Reopen and give a Reason. The reason is recorded.
Financial statements
| Statement | What it shows |
|---|---|
| Balance Sheet | Assets, Liabilities and Equity at a date. It confirms Balanced when the books agree. |
| Income Statement | Revenue and Expenses over a period, and the Net Income |
| Cash Flow | Net Income adjusted for non-cash items, giving Cash at Start, Net Cash Flow and Cash at End. It shows Reconciled when it matches the actual movement in Cash & Bank. |
Choose the dates at the top of each statement.
GST return
Go to GST Return, choose the period (From and to), and click Download GST Return (Excel). You get a GSTR-1 / GSTR-3B workbook built from your bills, invoices and purchases, ready for filing or for your tax consultant.
Importing historical data
Moving from another accounting tool such as Zoho Books? Go to Import, click Download Template, fill in your historical ledger entries, and upload the file. Each row is checked first, and you see how many are Valid or Invalid. Only then are the entries posted. You'll see how many journal entries were imported.
Bank reconciliation
- Go to Bank Reconciliation and click Download Template to see the expected format, or use your bank's export.
- Click Upload Statement (.csv, .xlsx). Lines that clearly match your books are matched automatically, and you'll see how many lines were imported, auto-matched and skipped.
- For each remaining Unmatched line, click Match and choose the corresponding entry in your Cash & Bank account. Click Ignore for lines that don't belong in the books, such as bank-to-bank transfers.
Use the Unmatched, Matched, Ignored and All filters to track progress. Unmatch undoes a wrong match.