How access works
What a staff member sees is decided by three things:
- The modules in your plan: a screen for a module you don't have never appears.
- The properties they're assigned to: staff work only in their own properties (see Staff, Shifts & Payroll).
- Their role's permissions, for example can void a bill or can approve a purchase order.
The Owner always has full access. Roles & Permissions (the RBAC menu) is available to the owner only.
Roles
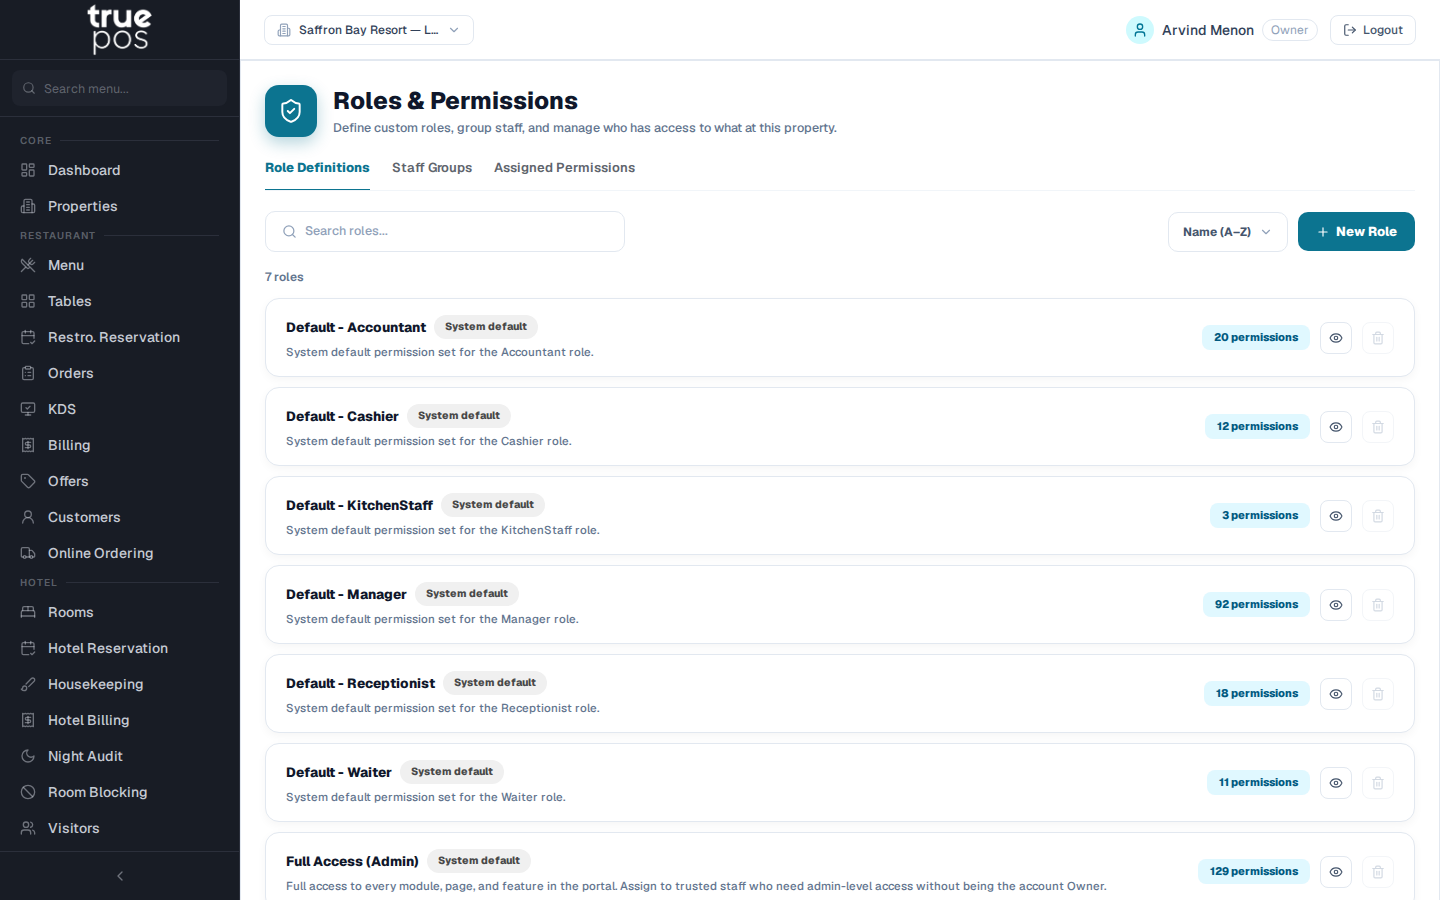
Go to RBAC. The Role Definitions tab lists every role.
- Ready-made roles (Default - Manager, Default - Cashier, Default - Waiter, Default - KitchenStaff, Default - Receptionist and Default - Accountant) are created for you, and marked System default. They can't be edited or deleted. Click View permissions to see what each includes, and see the Appendix for a summary.
- Full Access (Admin) is a preset with every permission. Give it to a trusted manager who needs admin-level access without being the owner.
Creating a custom role
When a ready-made role doesn't fit, for example a Shift Lead who needs a cashier's access plus the ability to void bills:
- Click New Role.
- Enter the Role Name * and a Description.
- Optionally set a PO Approval Limit (₹): the largest purchase order this role can approve. Leave it empty for unlimited.
- Under Permissions, tick what the role can do. Use Search all permissions... to find one quickly, or Select all / Clear all.
- Click Save Role.
Note: A few permissions are labelled Not yet enforced. They are reserved for upcoming features and have no effect today.
Staff groups
Groups save time when many people need the same access, for example All Waiters. On the Staff Groups tab, click New Group, name it, then Add member for each person. Roles given to a group apply to everyone in it.
Assigning a role
- On the Assigned Permissions tab, click Assign Permission.
- Under Assign to, choose Individual Staff or Staff Group, and pick the person or group.
- Choose the Role to assign.
- For an individual, Keep default role active (ticked by default) adds this role on top of their ready-made role. Untick it to switch their ready-made role off at this property, so their access comes only from the role you're assigning.
- Click Assign Role.
Assignments are made for the property selected at the top of the screen (Assigning at:). The Assigned Permissions tab lists who has which role there. Remove an assignment to take the access away.
Audit log
Go to Audit Log to see every create, update and delete across your account: who did it, when, and the before and after values of each field. Filter by Entity (for example Order) and by action (Create, Update or Delete), and click an entry to see exactly what changed.
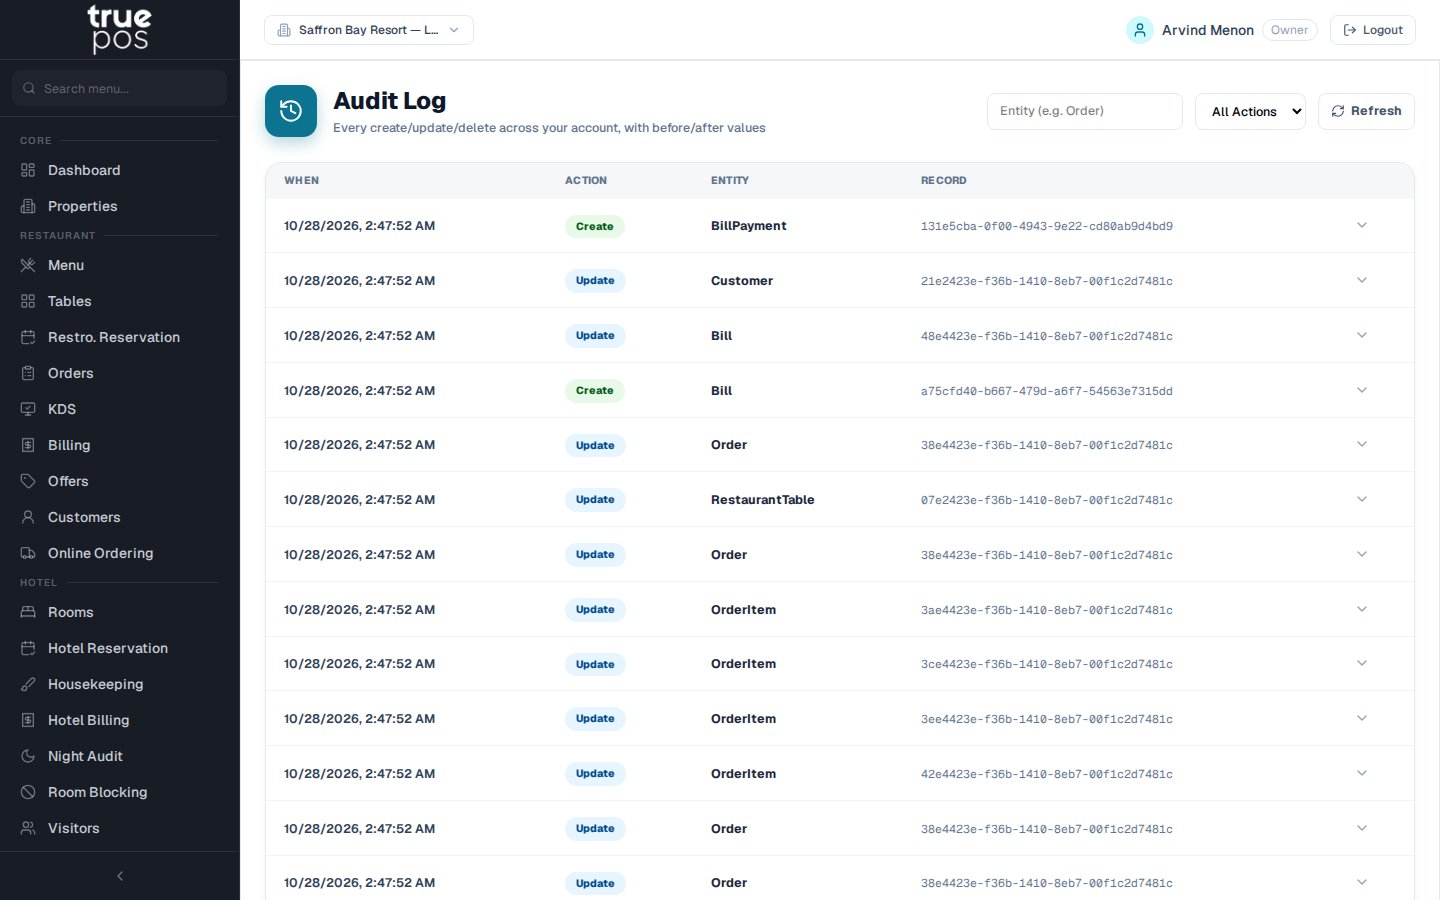
Tip: Use the audit log to answer questions like who changed this price? or who voided that bill?
Good security habits
- Give every staff member their own login. Never share passwords at the counter.
- Give each person the smallest role that lets them do their job.
- Deactivate staff the day they leave.
- Always Logout on shared computers.