In this chapter
How stock flows
| Step | Screen | What happens |
|---|---|---|
| 1 | Requisitions | A department asks for what it needs |
| 2 | Procurement → Purchase Orders | The request becomes an order to a supplier and is approved |
| 3 | Procurement → Goods Received Notes | Goods arrive and are counted in. Stock goes up. |
| 4 | Menu → recipes | Each dish served uses up its ingredients. Stock goes down. |
| 5 | Inventory → Wastage / Stock Take | Spoilage and count differences are recorded |
| 6 | Procurement → supplier bills and payments | The supplier's invoice is matched and paid |
Ingredients
Go to Inventory and open the Ingredients tab. Click New Ingredient, enter the Name * (for example Tomato), the Unit * (kg, litre, piece and so on), a Category, and optionally the HSN/SAC Code, then click Save.
Click Price history on an ingredient to see what you've paid for it, By Supplier and in Full History. It also shows which supplier was Cheapest latest.
Stock levels
The Stock tab shows, for this property, each ingredient's quantity On Hand, its Alert level and its Cost/unit.
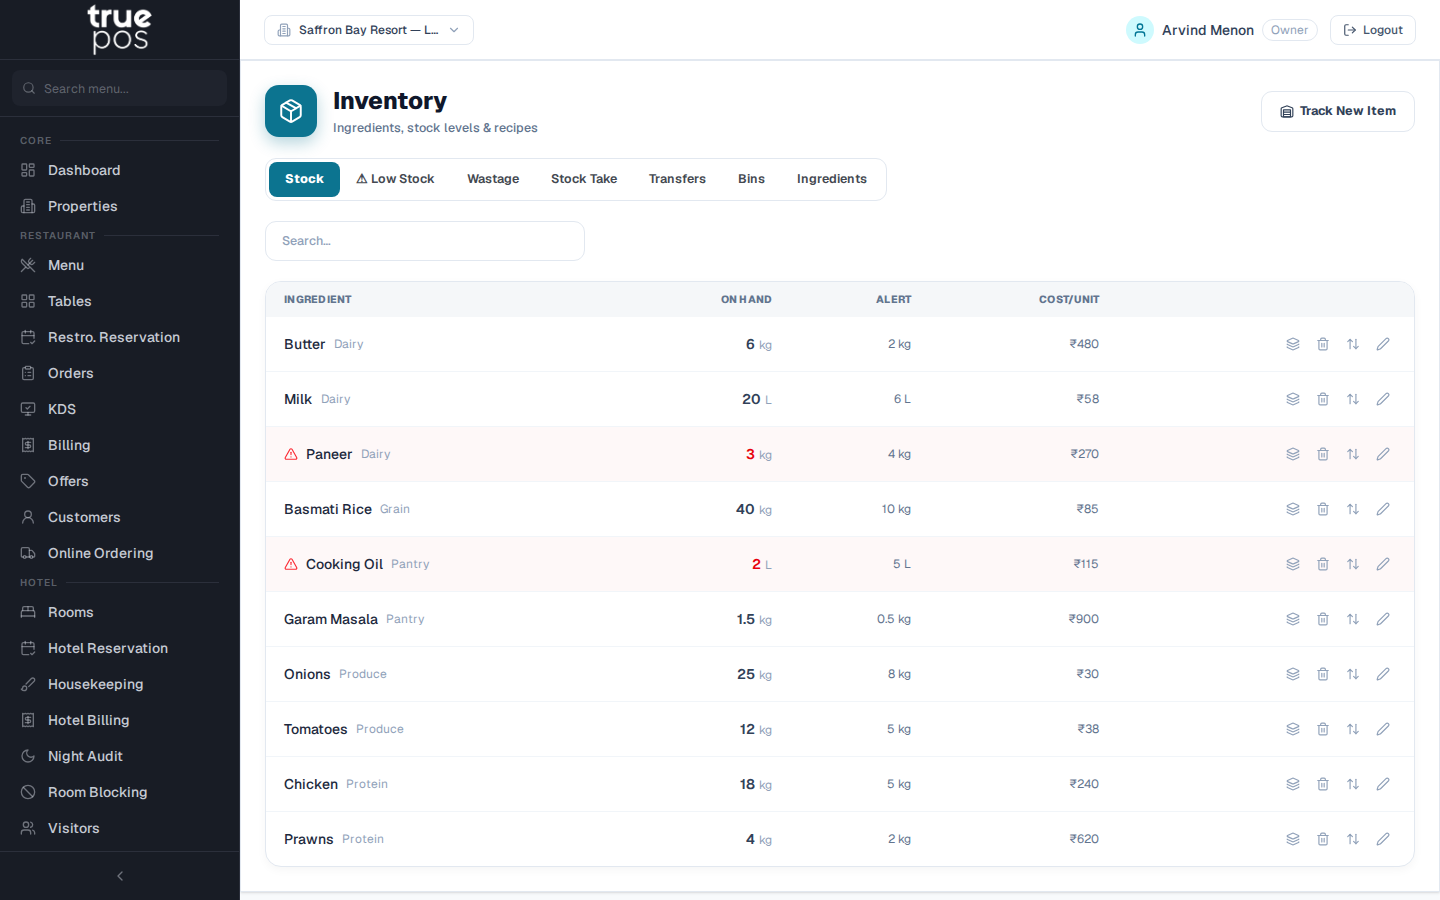
- Track New Item starts tracking an ingredient at this property.
- Edit settings sets the alert level (0 = no alert), the storage Bin, and Auto-Reorder (a reorder point and quantity).
- Quick adjust corrects a quantity, for example +5 or −2. Choose the Type (Purchase, Sale, Manual Correction or Return) and add Notes.
- View batches shows the batch numbers and expiry dates of stock received through goods receipts.
The Low Stock tab lists everything at or below its alert level. Click Restock to reorder. When everything is fine, it says All stock levels are healthy.
Tip: With Auto-Reorder set on an ingredient and switched on in Settings → Property, a Draft purchase requisition is created automatically when stock falls to the reorder point.
Recording wastage
On the Wastage tab, record what was thrown away. Choose the ingredient, enter the quantity, and pick a Reason: Spoilage, Expiry, Breakage, Prep Error or Other. Some records need a manager's approval, so they show Wastage recorded — pending approval. A manager then clicks Approve, or Reject with a reason.
The tab shows Total Cost (30d) and Records (30d), so you can see what wastage is costing you.
Stock take (physical count)
- On the Stock Take tab, choose a bin or All bins (whole property), and click Start Stock Take. The system records the quantities it expects.
- Staff count each item and enter the Counted Qty. The screen shows the Variance and its Cost Impact.
- When the count is finished, click Reconcile. Stock levels are corrected to the counted figures.
If items were sold or received while the count was in progress, they're listed when you reconcile, so nothing is lost.
Storage bins and transfers
Bins split one property's stock into storage locations, for example Walk-in Fridge or Dry Storage. Add them on the Bins tab. A property with no bins simply tracks stock as one total.
To move stock between locations, open Transfers and click New Transfer. Choose From and to, and add the items with + Add item. The sender clicks Dispatch, and the receiver clicks Receive.
Purchase requisitions
Departments use requisitions to ask the purchase team for stock.
- Go to Requisitions and click New PR.
- Enter the Department * (for example Kitchen), who it's Requested By, the Required By Date *, and optionally a Preferred Supplier.
- Add the items and quantities with + Add Item, then click Create PR.
- Click Submit to send it for approval.
A manager clicks Approve or Reject. To turn an approved requisition into an order, click Convert to PO, choose the Supplier *, and enter a Rate ₹ for every item. You'll see PO created.
Suppliers
Go to Procurement and open the suppliers list. Click Add Supplier and enter:
- the Name *, Contact Person, Phone and Email
- the GSTIN, PAN, Payment Terms (for example Net 30) and Address.
If you deduct tax at source, tick TDS Applicable and enter the TDS Rate (%).
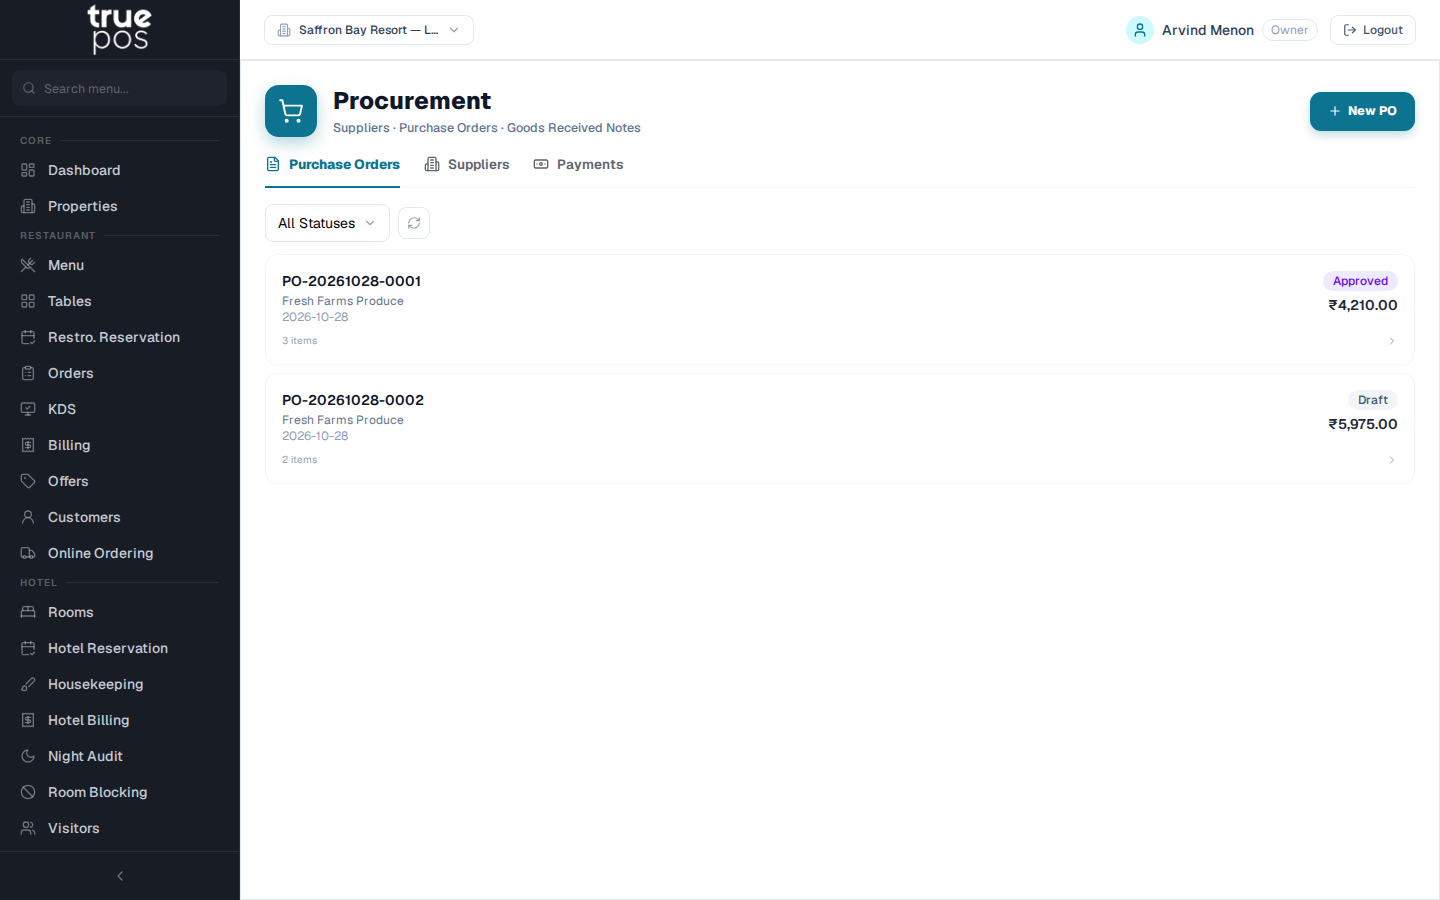
Purchase orders
- In Procurement, click New PO.
- Choose the Supplier *, the Order Date * and the Expected Delivery date.
- Add each item (Add Item) with its Qty, Rate ₹ and GST %. The Total is calculated for you.
- Click Create PO. It starts as Draft.
- Click Submit. Then someone with enough approval authority clicks Approve.
| PO status | Meaning |
|---|---|
| Draft | Being prepared, and can be edited |
| Submitted | Waiting for approval |
| Approved | Sent to the supplier |
| PartiallyReceived | Some goods have arrived |
| Received | Everything has arrived |
| Cancelled | Cancelled |
Note: Each role can have a PO Approval Limit. A purchase order above someone's limit needs a person with a higher limit to approve it. See Users & Security.
Revert to Draft unlocks an approved PO for editing, but only before any goods have been received.
Receiving goods (GRN)
When a delivery arrives:
- Open the PO and click Receive Goods.
- Enter the Received Date, and for each item the Qty Received, Unit Cost ₹, and optionally the Batch No., Expiry Date and Bin.
- Click Create Draft GRN. Check it, then click Post GRN.
Posting the goods received note adds the goods to stock and updates the average cost of each ingredient. A posted GRN entered by mistake can be undone with Reverse.
Supplier bills and payments
- Recording the supplier's invoice: on a posted GRN, click Record Invoice, and enter the Invoice Number *, Invoice Date and Invoice Amount *. The Match column shows whether the invoice agrees with what was received.
- Paying the supplier: click Record Payment, and enter the Payment Date, Amount *, Method and Reference Number (UTR or cheque number). Optionally link it to an invoice. For TDS suppliers, the tax to deduct is suggested automatically and the Net Payable is shown.
Each supplier's page shows Total Bills, Amount Paid and Outstanding. The payments ledger can be searched and filtered by supplier, method and date.