In this chapter
Signing in
Your account owner creates your login and gives you your email address and password.
- Open the Business Portal address in any modern web browser (Chrome, Edge, Safari or Firefox).
- In Email address, type your registered email.
- In Password, type your password. Click the eye icon to show or hide what you've typed.
- Click Sign In.
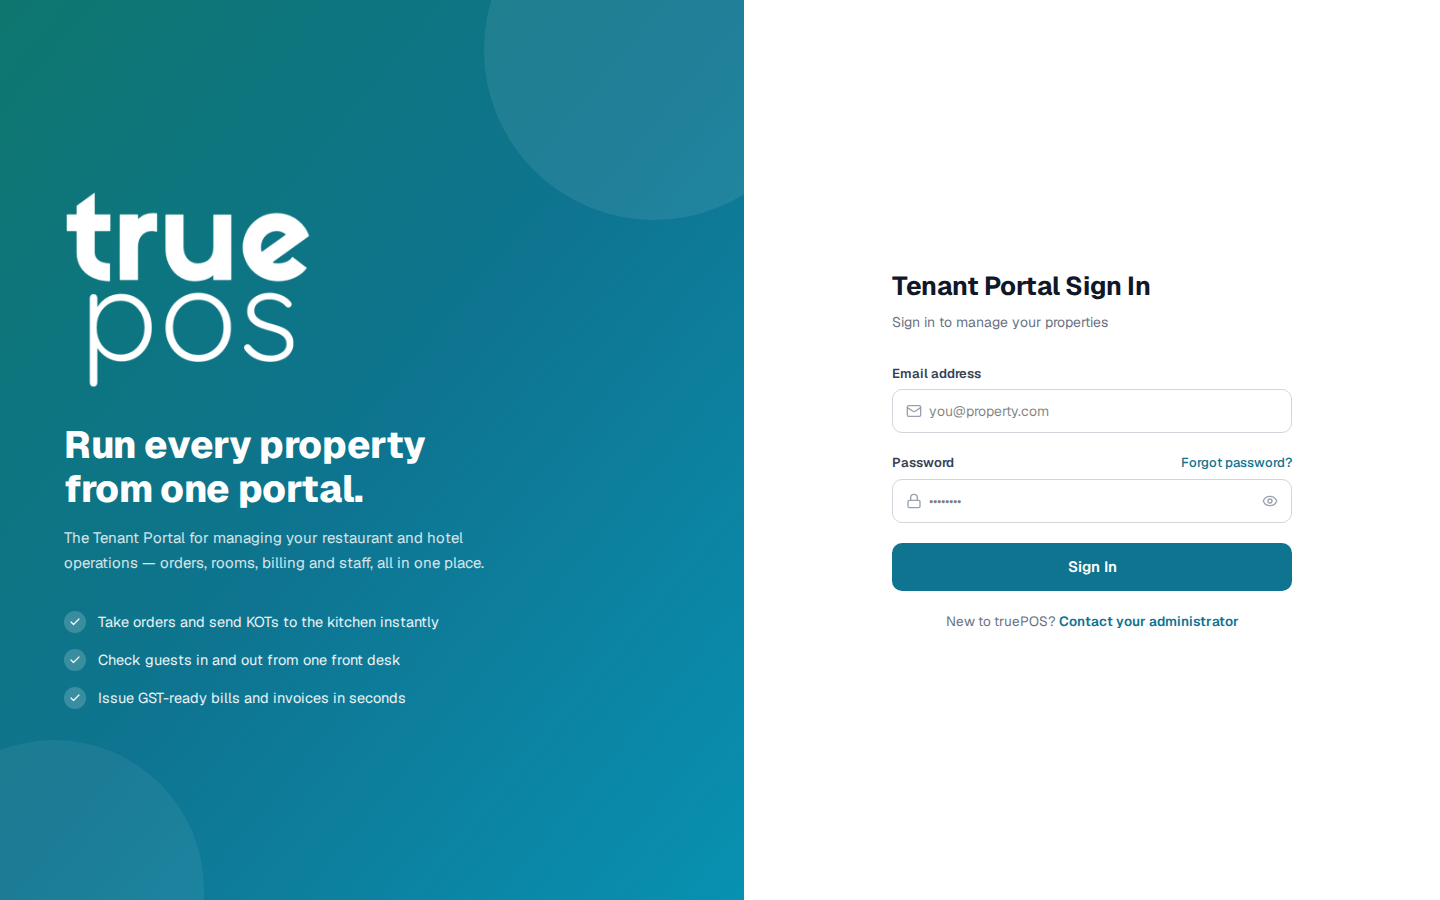
Tip: If you see Invalid email or password, check for typing mistakes and that Caps Lock is off. After that, use Forgot password? (below).
Resetting a forgotten password
- On the sign-in screen, click Forgot password?
- Enter your email address and click Send Reset Link.
- Open the email and click the reset link.
- On the Reset Password screen, enter your New password, then type it again in Confirm password.
- Click Reset Password, then sign in with your new password.
Note: A reset link works only once. If you see This reset link is missing its token, request a new link.
The dashboard
After you sign in, you land on the dashboard. It greets you by name and shows your business name with a count of your properties (for example 3 properties · 2 active).
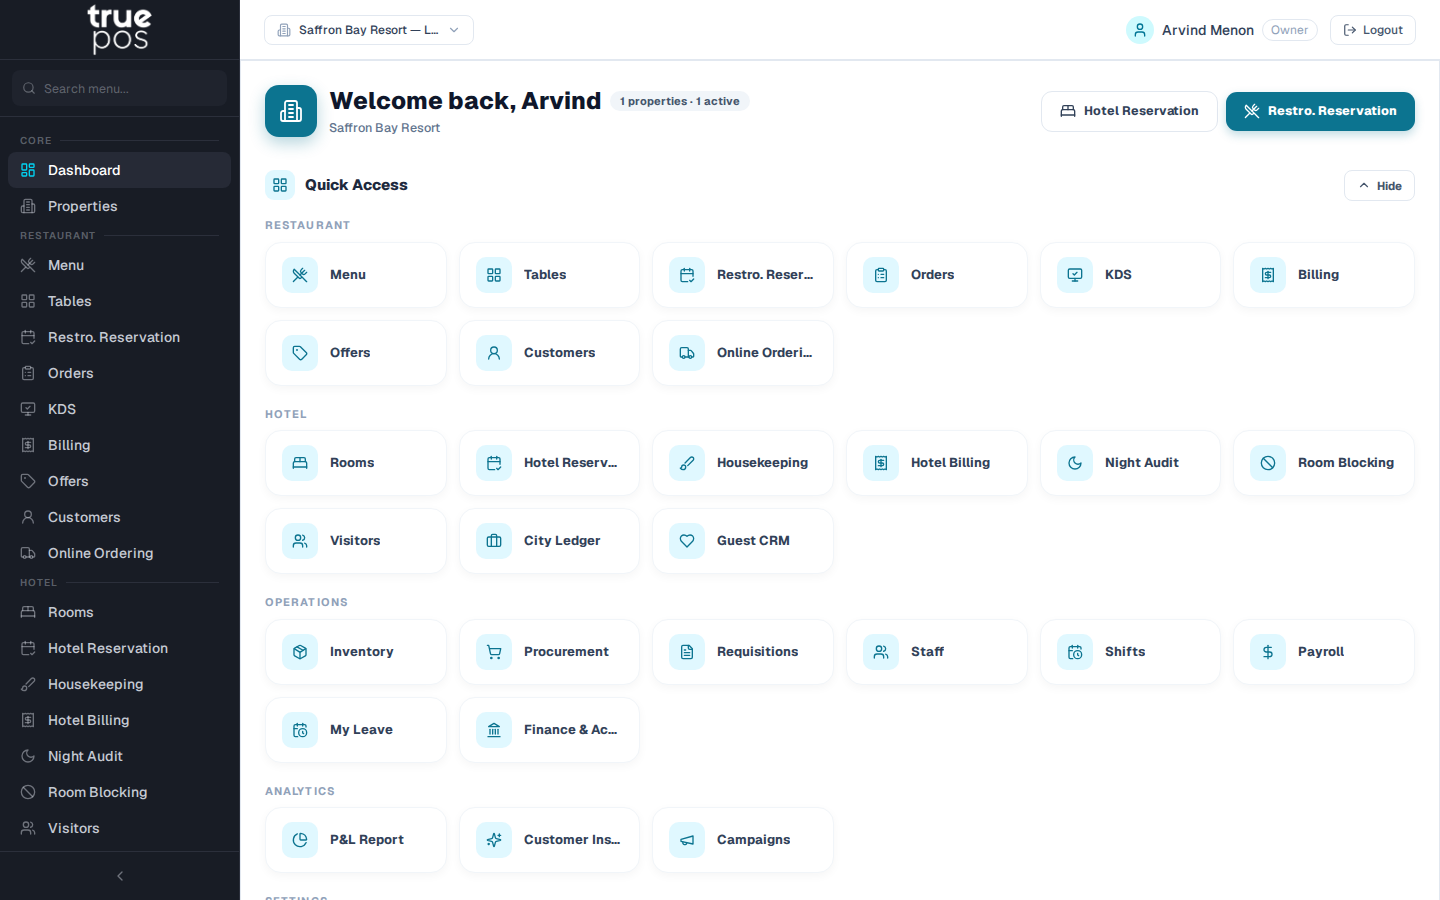
What appears on the dashboard depends on your role:
| Section | What it shows | Who sees it |
|---|---|---|
| Reservation shortcuts (top right) | One-click buttons to Hotel Reservation and Restro. Reservation | Staff who can view reservations |
| Quick Access | Tiles for every screen you can open, grouped by area. Click the arrow to collapse or expand it. | Everyone |
| Business overview | Combined figures for all your properties: Revenue, Orders, Active Now and Locations | Owners and managers with analytics access |
| Your Properties | A card for each property, with a link to manage them | Owners and staff with settings access |
Tip: Waiters, cashiers, kitchen staff and receptionists usually see only the Quick Access tiles. That is expected. It keeps their screen focused on their own work.
Finding your way around
The left-hand menu
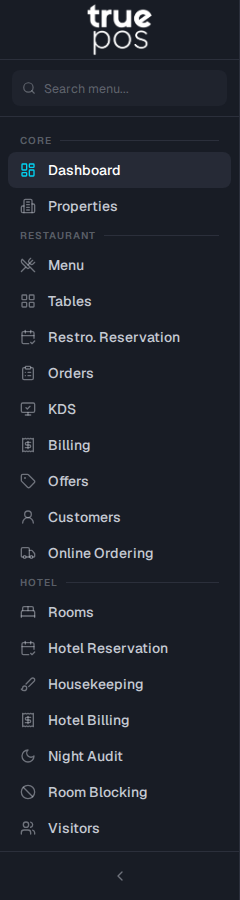
The menu on the left lists every screen you can use, grouped into sections:
| Section | Contains |
|---|---|
| Core | Dashboard and Properties |
| Restaurant | Menu, Tables, Restro. Reservation, Orders, KDS, Billing, Offers, Customers, Online Ordering |
| Hotel | Rooms, Hotel Reservation, Housekeeping, Hotel Billing, Night Audit, Room Blocking, Visitors, City Ledger, Guest CRM |
| Operations | Inventory, Procurement, Requisitions, Staff, Shifts, Payroll, My Leave, Finance & Accounting |
| Analytics | Occupancy, Revenue, P&L, Food Sales Analytics, Customer Insights, Campaigns |
| Settings | RBAC (roles and permissions), Settings, Audit Log |
- Search the menu: type in the Search menu... box at the top to filter the list, for example "bill" to find both Billing and Hotel Billing.
- Collapse the menu: click the arrow at the bottom of the menu to shrink it to icons only, which gives you more working space.
- On a phone or tablet: tap the ☰ button at the top left to open the menu.
The top bar
| Control | What it does |
|---|---|
| Property switcher (top left) | Chooses which property you are working in. See below. |
| Your name and role (top right) | Shows who is signed in and their role, for example Manager. |
| Logout | Signs you out. Always log out on a shared counter computer. |
Switching between properties
If your business has more than one property, choose which one you are working in before you take orders or bookings.
- Click the property switcher at the top left. It shows the current property name, or All properties.
- Pick a property from the list.
Choose All properties to see combined figures across every location, where a screen supports it.
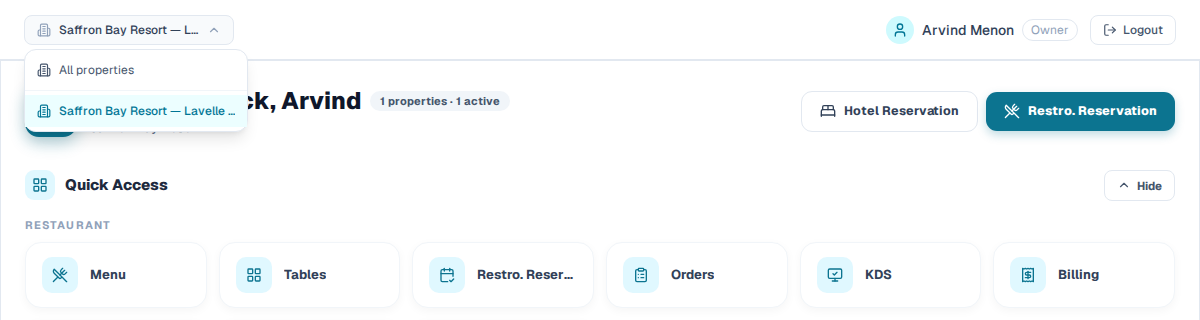
Important: A property marked Inactive has no active subscription, so it can't be selected. Contact your truePOS partner to activate it.
Your profile
Open Settings → Profile to see your First Name, Last Name, Email, Organisation and Role.
The Reporting Currency card sets the currency used for cross-property reports and the business overview on the dashboard. Amounts from every property are converted into it at the exchange rate on the date of each transaction.
Important: Choose the reporting currency before you start trading. Once financial records exist, it shows Currency locked — transaction data exists and can no longer be changed.
Signing out
Click Logout at the top right. You'll see Logged out successfully and return to the sign-in screen.