Setting up your menu
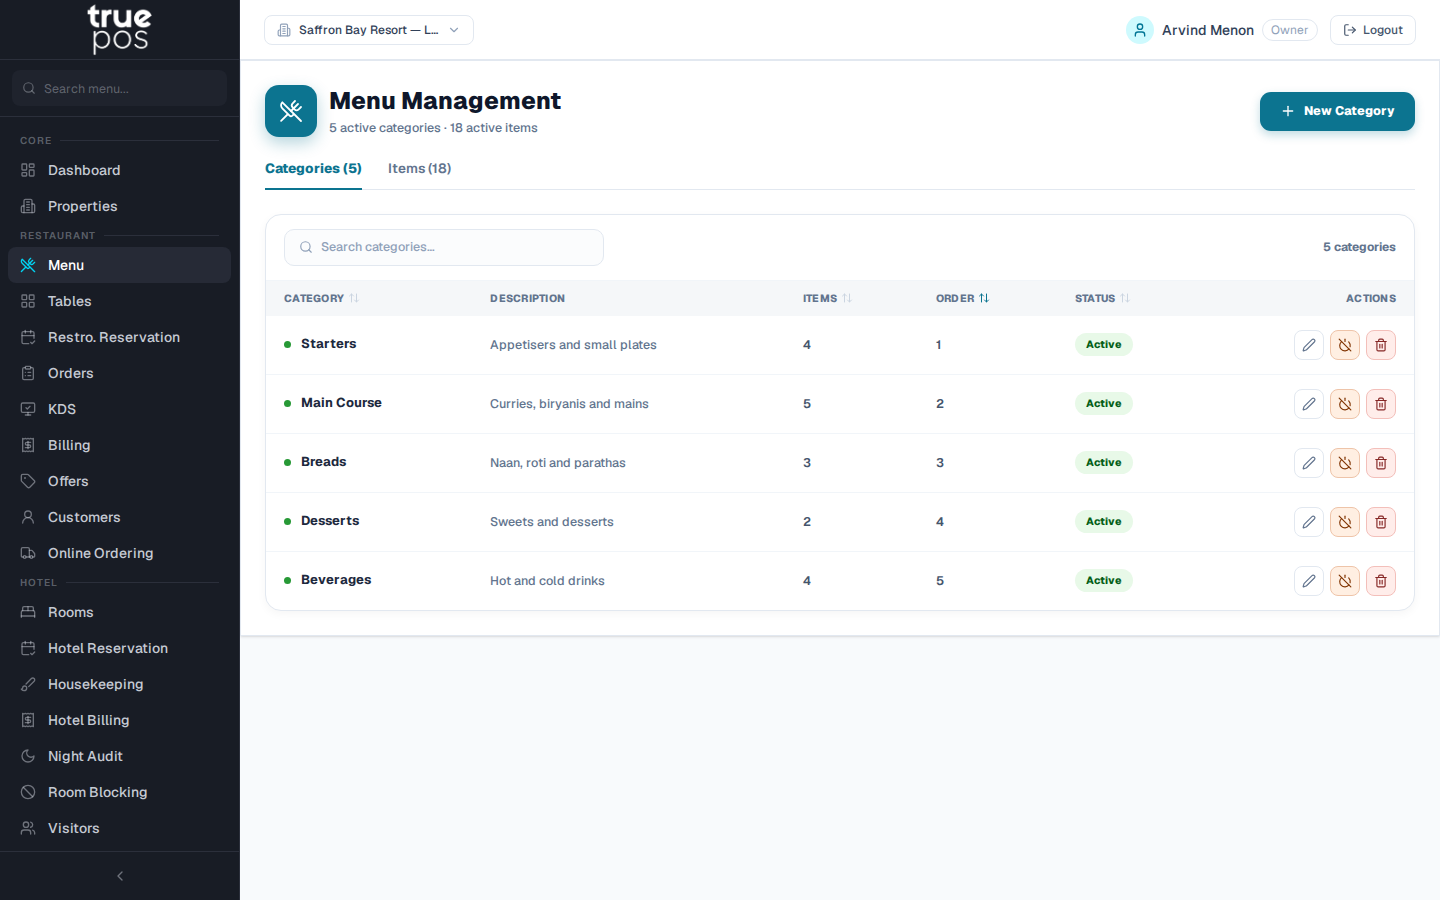
Go to Menu. The screen has two tabs: Categories and Items. Create your categories first, because every item belongs to one.
Adding a category
- On the Categories tab, click New Category (or Create First Category).
- Enter the Name * (for example Starters) and an optional Description.
- Set the Display Order to control where the category appears on the order screen.
- Click Save. You'll see Category created.
Adding a menu item
- Open the Items tab and click New Item.
- Choose the Category *. If the item should also appear under other categories, select them in Also available in.
- Enter the item's name, Base Price (₹) * and HSN/SAC Code (needed for GST invoices).
- Set the Sort Order, and whether the item is Vegetarian or Non-vegetarian.
- Set the item's Availability.
- Click Save. You'll see Item created.
Tip: When you add a new category or item, the form stays open after you save and clears itself, so you can add several in a row. Editing an existing item closes the form after saving.
Variants (Half/Full, sizes)
For an item sold in more than one size, click Manage variants on the item. Enter a Variant name (for example Half Plate) and its price, click Add, and mark one variant as the Default. On the order screen, staff are asked to pick a variant when they add the item.
Recipes: linking items to stock · Inventory add-on
If you use the Inventory module, click Manage recipe on an item to list the ingredients it uses and their quantities. Click Add Ingredient for each one, then Save Recipe. The ingredients are then deducted from stock automatically each time the item is served.
Note: Until an item has a recipe, serving it doesn't change your stock levels.
Importing your menu from Excel
To load a large menu at once:
- Click Import Excel.
- Click Download template, and fill in your items in the downloaded file.
- Upload the file. You'll see how many items were imported.
Switching items or categories off
Click Deactivate to hide an item or category, for example when a dish is unavailable for the season, and Activate to bring it back. Delete removes it permanently. Use the filter (Active only, Inactive only or All) to find hidden items.
Setting up floors and tables
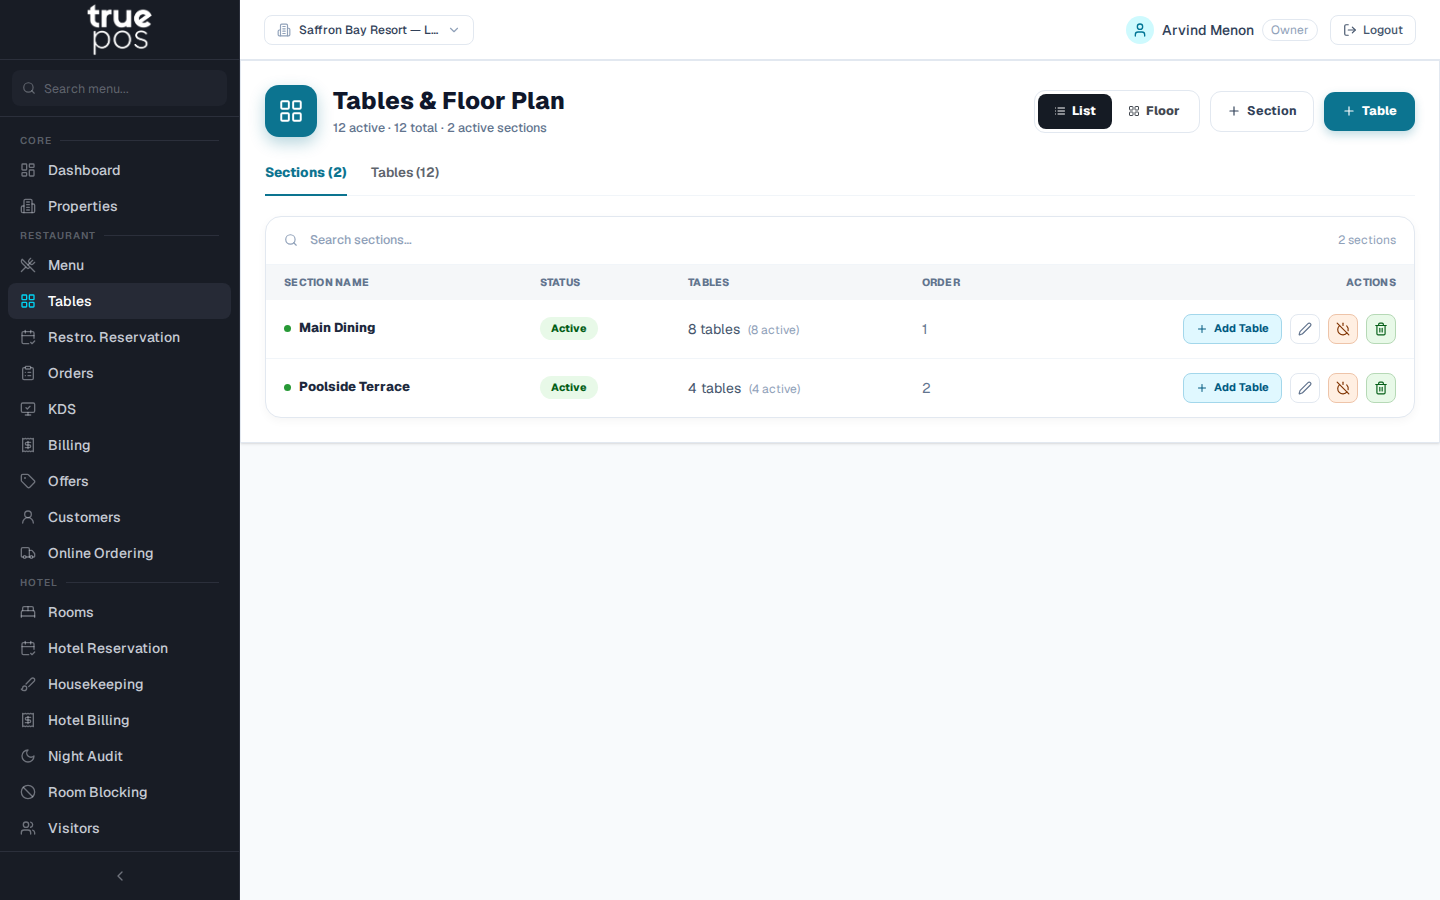
Go to Tables. Tables are grouped into sections, for example Indoor, Rooftop or Garden. Create a section first, then add tables to it.
Adding a section
- Click Section (or Create First Section).
- Enter the Section Name * and Display Order, then click Save.
Adding a table
- Click Table, or click Add Table on a section.
- Choose the Section *, and enter the Table Number * (for example T1) and an optional Display Name (for example Table 1).
- Enter the Capacity, the number of seats.
- Click Save.
List and floor views
Switch between List, a searchable table of sections and tables, and Floor, a visual floor plan. On the floor plan each table shows its live status:
| Status | Meaning |
|---|---|
| Available | Free to seat guests |
| Occupied | Guests are seated and an order is open |
| Reserved | Held for a reservation |
| Cleaning | Being cleared and reset |
To change a table's status by hand, click it and choose a new status.
QR codes for self-ordering
Every table can have its own QR code. Guests scan it with their phone to see your menu and, if you allow it, order and pay without waiting for a waiter.
- On Tables, click Show QR on a table to see its Table QR Code.
- Print it and place it on the table. Click Open Menu to preview what guests will see.
- To let guests place orders from the QR menu, turn on Allow Self-Ordering in Settings → Property.
- To let them pay online too, connect Razorpay in Settings → Payment Gateway. See Settings.
Note: Hotel rooms have their own room-service QR codes. See Housekeeping & Room Service.